


Cosplay Bow Tutorial – How I made my Violet Link bow from Four Swords Adventure.
Hello all!
It’s time to post my first tutorial here! This is how I made Link’s bow from Four Swords Adventure. Keep in mind that I didn’t manage to take many progress pictures along the way as I had very little time to get this bow ready for an event. BUT, I will try to explain the process in as much detail as possible, and I’ve made some “diagrams” …in MS Paint. I will also include extra info on points where I find it relevant, and label it as such.
The methods I describe in this guide can of course also be adapted and used help make any bow you may wish to make! 🙂
YOU NEED: 4 sheets of EVA, some Worbla (Depending on how big you want the bow to be), Gesso, wood glue, hot glue, and acrylic paint.
TOOLS: Heating Gun, Hot glue Gun, paint brushes, a carpet cutter, a dremel and a mask to cover your mouth + goggles.
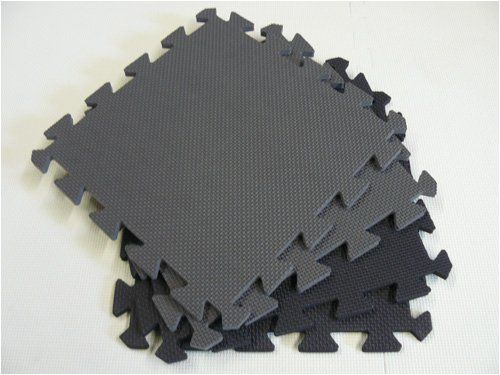
EVA foam: I needed about one package of EVA foam. Here one package is 4 sheets of EVA foam. I drew out a pattern, (So I could see how big I wanted it), on paper, and then I transferred that onto the EVA. We need about 3 layers of EVA foam to get the thickness/girth that we want as we are gonna dremel this to give it get the round shape that we want. Remember to wear a mask + goggles while doing this, EVA foam is really bad for your respiratory system, and it’s not good for your eyes either!
EVA foam usually looks like this:
Core
I constructed the bow in three parts – the two separate arms, and a wooden handle between them.
To begin making the arms of the bow, I made sure the pattern I’d made fit on a single sheet of EVA foam – I had just enough space to cut the curved arm diagonally from the sheets.
EXTRA INFO: To make sure the bow ends up being round-ish, the bow arm should be about as wide, at its base, as it will be thick; one layer of EVA foam is about 10mm thick, meaning it we will have final thickness 30mm, so I made the base of each arm about 30mm wide. This is not *extremely* important, it will however make it a lot easier for you to keep the arm round, when we get to that point. If, for example, it is very important for the bow you’re making to be no thicker than 25mm, to make it fit the size of your body, then make it 25mm wide, but you will have to grind/sand it thinner, so that the arm is as thick as it is wide (again – to make it so much easier, to make it round).

I cut out 3 “copies” of each arm, which I then stacked on top of each other, and glued together.
EXTRA INFO: If you were to make a thinner bow, you could of course also try only using two layers.

When gluing, I would put down the first arm piece and cover it with hot glue – since these arms are relatively big, the glue where I started glueing was almost dry when I’d finished covering the arm piece, so I then used my heat gun to reheat all the glue, and put the next arm piece on top of it. I repeated this process for the third piece.
Take care to keep moving the heat gun, as the EVA foam can melt if it is heated enough – it then also becomes really sticky, and you can really burn yourself.
When you’ve glued all the 3 pieces of each arm together, you’ll have two arms in the thickness that you want, but it is still square, rather than round, and we have to cut, dremel and sand it round.
To make this easier, draw a line down the middle of each side, ending at the point of the arm, like this: (it’s much easier to draw a middle line by hand than it is in MS Paint :D)

To make the middle line more accurate, use a ruler to measure the exact width of sides, and make a mark at the exact middle of the point you’re measuring – do this at several intervals along the arm, and use these points to guide your middle line:

The more points you mark, the more accurate your middle line will be – however, since the pattern we made for the arm is in all likelihood not a perfectly curved “cone”, there is no use in making too many points – for my bow arm, which was very roughly 40 cm long, I marked around 10 points. It’s much easier to fix the remaining imperfection when sanding.
Once you’ve drawn your middle lines, start making your bow arm round (I will refer to this process as “rounding”, not knowing whether this is an actual verb :D). The easiest way to do this, is to to round it a quarter at a time, between the middle lines.

To round the arm, start “whittling” (“spikke” for the norwegian readers) it with a carpet cutter:
 On the topic of carpet cutters: you’ll want one of these: with the sort of blade that extends about 7-8cm, not the one with only one blade of 2-3 cm. Carpet cutters of this type exist in three widths: 10cm, 18cm and 25cm. I’m partial to the 18cm – the 10cm is usually too thin for this kind of work; the 25cm would do just as well as the 18cm, but will be less wieldy when carving more smaller things. So, if you’re only gonna have one carpet cutter, the 18cm is way to go, but there’s nothing wrong in keeping a 25cm around for the heavier cutting and straight lines.
When buying the blades, there are usually two types: the ones in a yellow/grey box, and the ones in a black box. The yellow ones are the normal blades, and is the kind of blade that will come with the cutter when you buy it. The black ones are extra sharp, but a little more brittle – prone to breaking – than the yellow ones. For the sort of whittling work we’re doing here, I prefer the black blades, since they’ll last longer than the normal blades – this is because the blades are oiled when you buy the box, and when that oil wears off, the blade won’t be able to cut the EVA foam with anywhere near as much smoothness as you want, when “whittling” it round – cutting off thin strips.
TL;DR – 18cm carpet cutter, black blades.
When rounding your arm with the knife, leave a little “extra” foam – we’ll smoothen it more with the dremel afterwards.
Dremeling!
 The dremel is a very good and important tool for cosplay. It doesn’t need to be a brand Dremel, here in northern Scandinavia, you can get cheaper, off-brand Dremels/”multitools” from Biltema or Clas Ohlson.
When smoothening your bow arms, you’ll want to use a sanding bit, like the one in the picture – it doesn’t really matter how gritty the sandpaper you use is, but the coarser it is, the faster it will eat through the EVA foam.
When sanding EVA foam with a dremel, set it to somewhere between 1.4k and 2k rpm, start slow and get a feel for the tool. Move the dremel along the length of the bow arm, never keeping it still, do not apply any force to the foam with the dremel, as it will eat through the foam very quickly, and once you’ve dremeled too much foam, you can’t get it back! If this is the first time you’ve dremeled, I’d start dremeling a bit of the foam you cut the arms from, just to get a feel for the tool, and how it works on EVA foam.
Now simply take your time, and make the bow arms round and smooth. They don’t have to be *perfectly* smooth, as the worbla doesn’t follow *every* irregularity in the EVA, but larger ones might become visible even through the worbla, but worbla is a lot easier to fix! 😀
Worblatime! I like to cut out one large piece of worbla for each side of each arm – just draw around your bow arm on a sheet of worbla, giving it an extra 2ish centimeters to wrap around your bow arm, cut out 2 copies, heat them up on by one, and apply them one at a time to your bow arm, so that they meet in the middle, and press them together in the seam, where they meet. Once the worbla has hardened, dremel it smooth wherever it has developed irregularities.
When you’ve dremeled your bow arms smooth, you can also sand it a little by hand, with fine sand paper, just to smooth it out that little bit more.
Handle
Now it’s time to attach your handle – you can use a wooden broom handle, or a piece of round wood, which you can get at any hardware store. You’ll want to cut your handle about 6-8cm longer than you really you want it, so you can sink it about 3-4 cm into each bow arm, to anchor it.
To anchor the the handle into the bow arm, I used a drill bit a little bit wider than the handle, so that there’s space for the glue in there too – my handle was 18 cm wide, so I used a used a 20 cm drill bit, to drill into the base of the bow arm, at the angle I wanted the handle to enter the handle. When you do this, be careful not to drill so far as to hit the worbla on the other side.
 You can measure very roughly by just laying the drill bit over the bow arm, so you can see how deep the bit goes before it hits the worbla on the side.
One thing you need to know about drilling into hot glued EVA like this, is that the foam and glue will be half drilled, and half melted, so there’ll be a bunch of melted glue and EVA foam on your drill bit – this is easiest to get off right after you’ve drilled, just pull off the bigger chunks by hand or with a knife/screwdriver, and clean the rest off with a rag/tissue wetted with denatured alcohol (rødsprit, in norwegian). I’ve also had luck with nail polish remover. After you’ve done this, you may still see traces of the EVA on the drill bit, but these will most likely so small that they won’t affect the bit’s performance, but it’s important to know, in case you plan on using your dad’s drill bits 😀
Also: SAFETY WARNING – rags/tissues wetted with denatured alcohol are extremely combustible, so you should soak them with water as soon as possible.
If you don’t own a thick enough drill bit, for example you have a 15 cm bit and an 18 cm handle, and you don’t want to buy a new bit, you can still make do, you just have to work longer, and work your drill bit around.
When it comes to the type of drill bit, I prefer the ones for metal – the ones for wood have a nasty habit of getting sort of snagged on the EVA.
Now that you’ve drilled holes for your handle in both bow arms, it’s time to glue them in there!
Glue
You have your choice in glues: either hot glue or some sort of construction glue, I know a lot of cosplayers are fans of contact glue, but I’ve yet to try it myself.
Hot glue works fast, but you may have problems getting as much of it as you want, all the way inside the hole before it cools and hardens. For these kinds of gluing jobs, I prefer construction glues – I’ve used all types for EVA foam, so there’s nothing in particular you have to watch out for there, you can get them at

 any hardware store. The reason I prefer these, is the long neck, that helps you get glue all the way into the hole, and their long setting/drying time, making it a lot easier to get your handle sitting at the right angle.
Another reason I like these glues, is that you can remove excess glue with your fingers without suffering 2nd degree burns 😀 you do have to use nail polish remover or something similar to get it off your hands afterwards, but it’s worth it for cosplay!
The downside is that their setting time is usually measured in hours, so you’ll have sit still and hold it until the glue has hardened enough. Just fire up netflix! 😀
Details
Once your bow is completely glued together, it is time for the details! The details are all very much down to what kind of bow you’re making – for my Link bow, I made the “box” thing at the base of each arm out EVA foam – I simply cut out 4 squares, clued them together with hot glue, and dremeled out the details on them.
For the “metal sheet” and wave-y thing at the end of each arm, I used 2mm crafting foam – for the “sheet”/point, I just wrapped the crafting around the bow arm, and for the wave-y thing, I cut out a piece of crafting foam in the shape I wanted, heated it with my heating gun (but not too much, or it’ll start charring!), and shaped it like I wanted it.
Painting
Before painting Worbla and EVA foam, it’s very important to apply a base coat.
On worbla, I apply a base coat of Gesso – the more layers you apply, the smoother it gets. On the link bow, I only applied about 5 layers, as I wanted it to a have a rough-ish, wooden texture. What’s great about Gesso is that it’s really thick, so you can sand it with fine sand paper, to make it even smoother!
On naked EVA foam, I like to use watered wood glue; and again, the more layers you apply, the smoother it gets – what you have to watch out for with wood glue is that you pretty much can’t sand it, it’ll just fall off, so take care to apply it smoothly, use a good brush. I used about 5 layers on the details on the bow, since I was in a rush to finish it, and it worked 😀 but I would have applied more, if I’d had the time.
Once you’re satisfied with your base coat, you can start painting! I always use acrylic paint, which I mix and blend until I get the color I want for each specific piece. Remember: a big part of painting, is having good brushes and a few metric tons of patience.
I’m planning to release a more detailed painting-guide at a later, after I’ve finished Leona!
Now your bow should look something like this:


